You’ve put a lot of thought into creating the right designs for merch based on your brand and music. With those designs, you decided on the best way to get those items made. Now, it’s time to sell!
For many independent artists, live shows don’t come as frequently so you want to make sure you’re maximizing these opportunities to sell when you’re performing live.
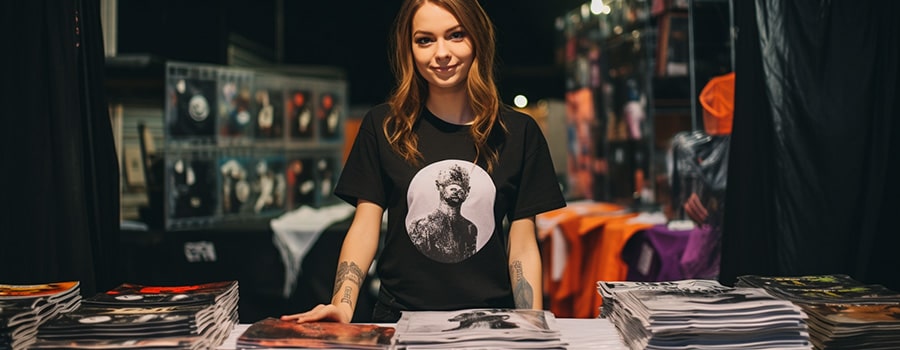
In this blog, we’ll go over all of the basics that you should keep in mind for selling merch in person and some tips to maximize your efforts.
Please Note: This blog contains affiliate links to Amazon, meaning that I get a small commission when you purchase any of the items I recommend. This is a great way to support all the work that went into this blog at no extra cost to you. Read my full affiliate link disclosure here.
Offer various payment options.
By default, you should at least be able to accept credit cards as it is the most popular form of payment. Square is the most commonly used payment service and they offer a free basic card reader when you sign up that attaches to your smartphone. There are other POS options as well such as Shopify and PayPal.
In case you want a backup or you lose it, you can also just order a Square Reader on Amazon for about $10.
If you want to invest in a better Square card reader, the next level up that costs around $50 to $60 dollars.
If you want a portable Square terminal that you don’t need to connect to your SmartPhone, you can get the Square Terminal.
Cash is ideal but you’ll need to have a change available. If so, it would be smart to invest in a cash box and have enough change before each show. You don’t really need anything big or fancy. Even a small cash bag will work fine.
You may also want to price items strategically to minimize the change you need, like selling items in increments of $5, $10 and $20 so you don’t need $1 bills. $200 in change should be enough.
Venmo, PayPal, Zelle and CashApp are also very useful payment options to have. To make transactions quick, I would print out a sheet of QR codes for each payment option you have set up along with your usernames. That way, customers can have their app out and ready to pay.
Here’s how to find the QR codes for each of the digital payment options:
Ask the venue beforehand about where merch is sold.
You want to make sure you know where the merch area is and what supplies are available to you. Do you need to bring your own table or racks to hang items up? How is the lighting? Is there actually good foot traffic or can you set up somewhere else?
Chances are the music venue will have a designated merch area that is optimal for selling. In case you’re performing somewhere that is not typically for music, try finding any space closer to the entrance/exit where foot traffic is forced to go.
Most of the time, music venues should have tables available for you to set up on. If not or you’re performing, here’s a great 6ft folding table option and a black table cloth.
Stick around after your live performance.
This is such a big opportunity for you to build deeper relationships with your fans and potentially sell merch. Whether it’s to chat, take a photo with you or have something signed, you want to stay around your merch table for your fans as long as you can after your set. When talking about building your brand, making yourself available physically for fans is one of the best things you can do. It’s not scalable but it’s important especially for emerging artists. Just be sure to let people know you’re doing it and where after your set.
Have someone sell merch for you.
Your priority after performing is to spend time interacting and engaging with fans. Having someone handle all of the merch transactions will free up time for you to focus on those who support you. Try to see if you can have a friend offer a couple of hours to sell merch for you at the table.
Otherwise, some venues might have someone available to sell merch for you, but they’ll charge you and take a small cut of your sales. Depending on the venue, they may only take a cut of soft sales (shirts, hats, sweaters) as opposed to hard sales (CD, Vinyl). Some may take a percentage of both. Make sure to ask ahead of time so you’re clear on their policies and maybe try to negotiate better terms.
Mention you have merch for sale during your set.
Not everyone is going to know that you have a merch table set up so be sure to mention it sometime during your live performance. You can even point it out if it’s in view. To remind yourself, make a note of it in your set list or do it at the end, especially if you’ll head to the table after your performance.
Have prices, sizes and color options visible.
Have a tag or label next to the item with a price and any other details. You can also have a printed price list that is visible. This is particularly important if you’re by yourself at the merch table. You don’t want to waste any time having to answer any questions about prices when you might have a line of people wanting to get your attention to talk or get a photo.
If you’re printing something out, be sure to laminate it to prolong the use of it.
Give away something free at your merch table.
Leave some free stickers, mini prints, posters or pins at the merch table to give a reason for people to stop by. Be sure to have a sign or note to let people know it’s free.
Stickers are relatively cheap to make. There are tons of companies that do them but here are two popular options:
Presentation matters.
No one likes to shop in a messy, unorganized shop so you need to make sure your table and setup is inviting. Bring some nice hangers to hang up shirts and hoodies on a grid wall panel display so they aren’t wrinkled. Some venues may have display racks for you to use so ask first since they’re a bit pricey.
As for clothing, instead of rummaging through boxes to find sizes, create a system that allows you find the size you’re looking for. For example, if you fold in the flaps of a cardboard box, you can use each of the 4 sides to lay one size of shirts. Typically, you’re dealing with S, M, L, XL and 2XL so maybe one size like 2XL can stay folded at the bottom of the box. If you’re dealing with multiple clothing designs, arrange the sizes to same sides of the box to avoid any confusion. Larges can be on the left side of the box. The top side furthest away from you can be smalls.
Make sure the area is well lit so bring battery powered or rechargeable lamps for the table. If there’s a display rack, using a clampable reading light can help shine a light on the merch and make it more visible.
In addition to your table, you should also keep your products organized and in protective storage bins. It’ll make your life easier and keep your inventory protected.
Offer a discount or free item for email sign ups.
A live show is a great opportunity to collect emails for your mailing list. You can incentivize fans by offering a discount or a free item like stickers, poster or even a CD for signing up.
This can be done with a sign up sheet you printed out (just make sure they write legibly) or use a tablet like an iPad that has a digital sign up page set up. This can be done in email apps like MailChimp.
You can also create a QR code that goes to your email sign up page.
Bring Permanent Markers (Sharpies).
One of the perks of attending a show from a fan perspective is having the chance to talk to the artist, get a photo and have things signed. Not everyone will bring things with them to the show so having products to sell and Sharpies already at the table will make it more likely for people to buy something.
The default for autographs is a black fine point Sharpie, but it really depends on what’s being signed and the type of surface. Typically, you’ll most likely be signing the jacket sleeve of a vinyl record, a CD cover or a poster so Sharpies will work fine. If the surface is a bit glossy or metallic, you may need to be more careful. Make sure to let it dry and not to smear your autograph.
Blue fine point Sharpies work well too and are generally considered better for autographs because black is more prone to fading.
If the merch you have contains dark colored surfaces, you may consider having silver or gold fine point metallic Sharpies on hand.
Offer bundle packages or 2-for-1 discounts.
We all love a good deal. If you have multiple items for sale, like a shirt, hat and CD, offer it together for a little cheaper.
Another type of discount is offering 2-for-1 or “buy one, get one free.” This can be useful for something like CDs. The original idea is that if someone buys 2, they’ll likely give the other one away to a friend. Unfortunately, that tactic isn’t as effective in the streaming era since the majority of people don’t use CDs to listen to music but it’s something to consider if your demographic still uses them.
Make sure you have a sign that advertises your deals.
Check your internet connection and power for devices.
In order to process card transactions, you’ll need to be connected to the internet. Your typical music venue or small business should have Wi-Fi so be sure to get access. For festivals or outdoor gigs, make sure you have good enough reception or Wi-Fi to take credit card payments.
Whether you’re using your smartphone or a POS terminal to accept credit card payments, make sure to charge up your devices before the gig. Always bring chargers with you or consider buying a portable power bank you can carry with you as a back up.
Don’t offer too many design options.
Chances are you’re not going to have a ton of different items to sell in early stages of your career so this is nothing to really worry about. But in general, you don’t want to offer too many design options and give fans “choice overload.” You want to keep it relatively simple so fans don’t get overwhelmed and distracted by too many choices.
For example, 3 – 5 different shirt designs is more than enough. Of course, if you have multiple physical music releases, make sure to have them all on display.
Have an inventory and sales tracking system.
Before the show, do inventory to count how many of each item you’re bringing with you and quantities for each size. It will help a lot of you set up a spreadsheet and keep a log of sales for each show.
By the end of the night, count to make sure the sales totals at the end match up with the amounts you sold and how many of each item did you sell. This is helpful to let you know what sizes do you need more of in the future and what are the big money makers.
From my experience with the artists I work with, we notice that L and XL sell the most and that black is the preferred color for clothing when there are other color options.
If you’re already using something like Square as your Point-Of-Sale (POS) platform, you should be able to in put your products and track all of the sales.
For more advanced merch tracking apps, look into:
Conclusion
In this next and final blog of the series, I’ll be covering how musicians can maximize merch sales online.
D4’s Merch For Musicians Blog Series
– Part 1: What Merch Should Independent Artists Make That Fans Will Actually Buy
– Part 2: Bulk Ordering Or Print On-Demand? What’s The Best Way For Musicians To Order Merch
– Part 3: How Musicians Can Maximize Merch Sales At In Person Shows
– Part 4: How Musicians Can Maximize Merch Sales Online (Coming Soon)


