
Last Updated on 3/29/2023: There have been a lot of changes to Instagram since this blog was first published. Some things mentioned here are outdated but I will continue to add and update over time.
Now with over 1 billion active monthly users, Instagram has become one of the most important social media platforms for musicians, especially younger generations. It’s such a versatile platform with plenty of functions and settings that the average user might miss.
In this blog, I will cover Instagram tips, tricks, tools and tactics from the most basic to more well-known ones to maximize your presence and fan engagement on Instagram.
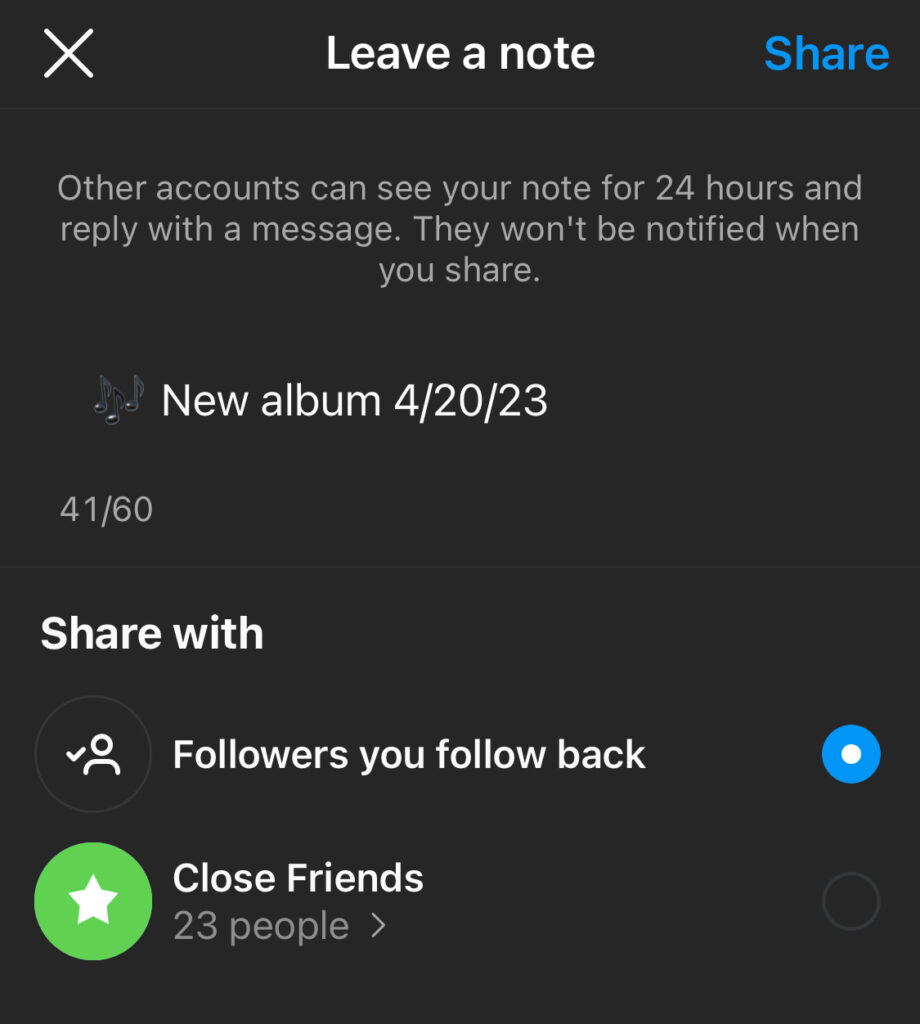
Leave a Note
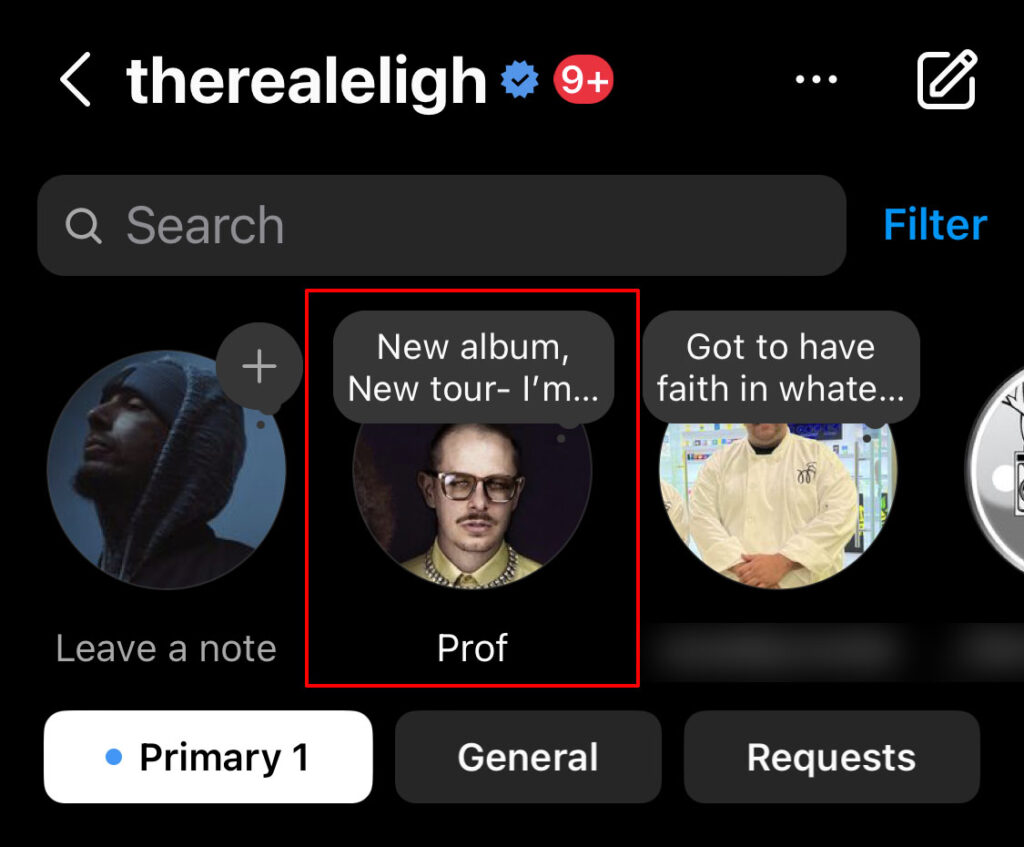
This feature on Instagram allows you to leave a short note or a song snippet that sticks on top of people’s direct message page for 24 hours. It will also display on the top of their profile picture from their main page.
As an artist, this could become a good way to remind others of a new release or an upcoming show. Currently, only those who follow each other can see these notes so it limits the potential reach this has but things may change in the future. However, this hasn’t stopped artists from using it as a promo tool as it is.
Add Lyrics to Your Songs In Instagram Stories
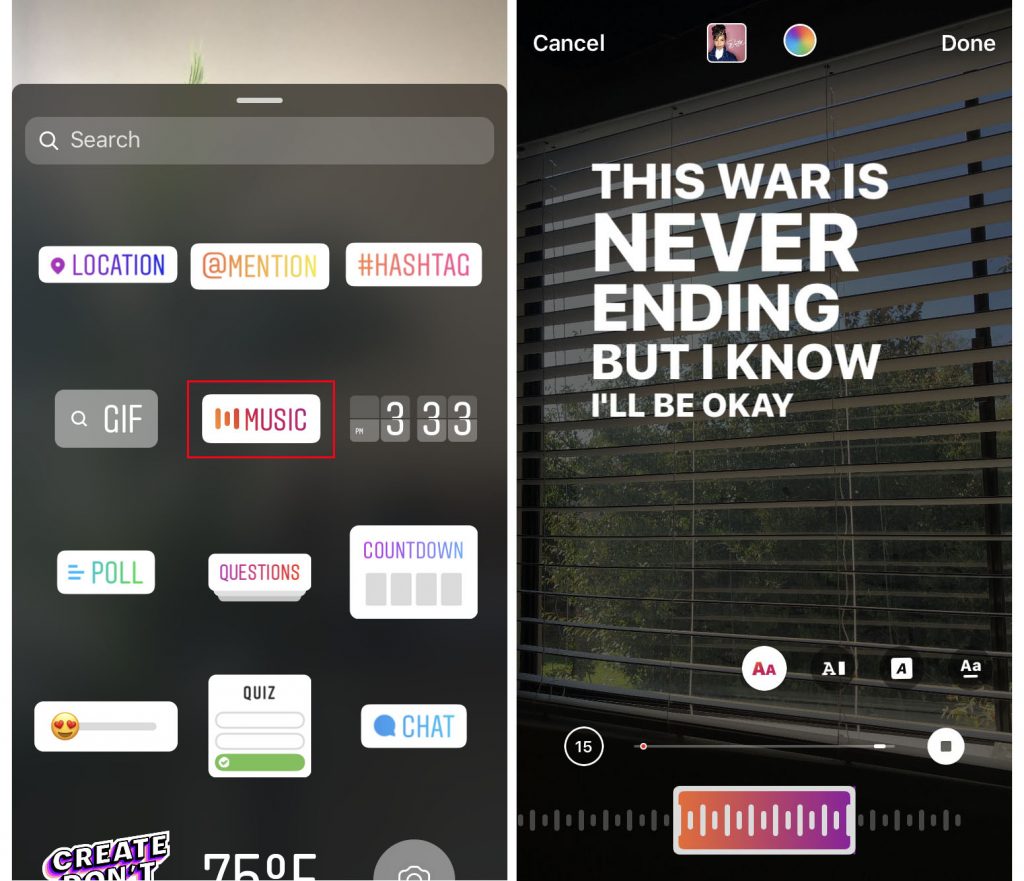
One of the newer features on Instagram Stories is the ‘Music’ sticker that adds lyrics to your story from a song you choose. There’s a good chance your music doesn’t have lyrics to show, but here’s how you add them.
When you upload your music to your music distributor (CDBaby, TuneCore, DistroKid), make sure to opt-in to Instagram & Facebook monetization which allows your music to be used in Instagram Stories.
Facebook and Instagram pulls lyrics from a third party site called MusixMatch. In order to add lyrics to MusixMatch, you need to verify your artist account on their platform. This allows the lyrics you input, to be the official lyrics.
Go to their website and follow the steps here:
https://about.musixmatch.com/artists/verified-artist
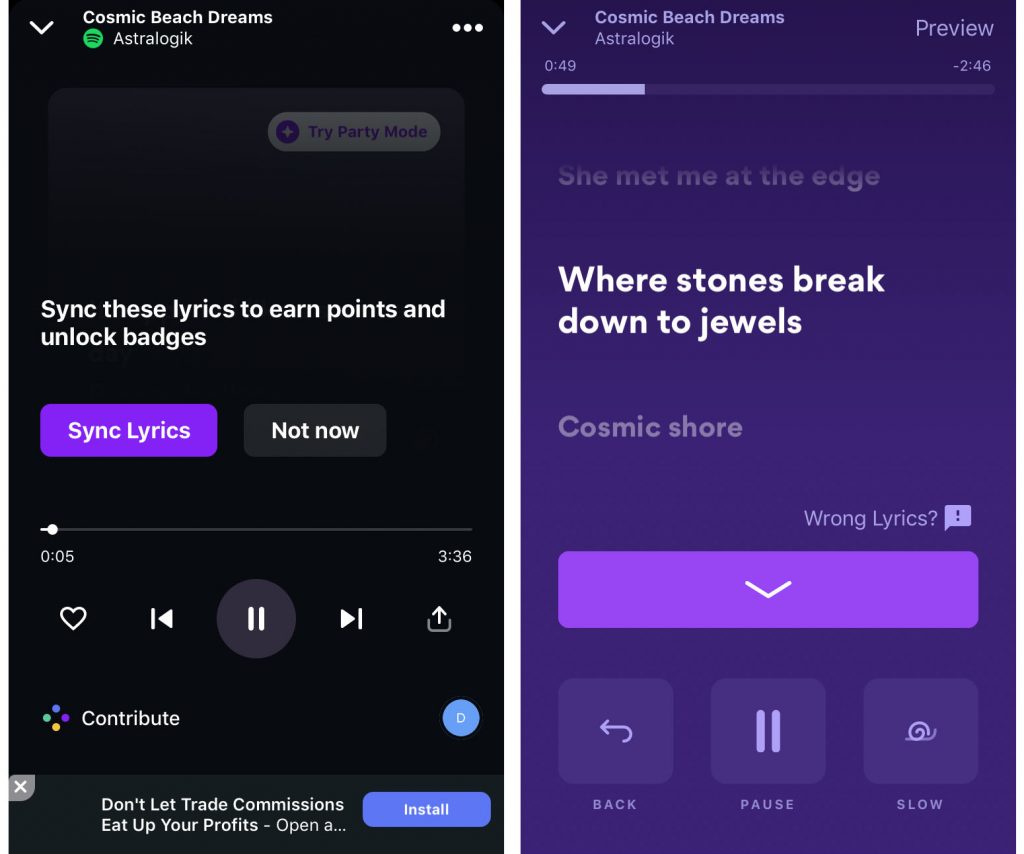
Once you are verified, you’ll sign in and add lyrics to your songs by clicking the ‘add lyrics’ or ‘+’ by the names. They will show specific guidelines, so make sure you follow them.
Once you submit lyrics to your song, there’s a MusixMatch app where you can listen to the song and sync your lyrics to the music. Go on the Musixmatch app, find your song and click on ‘Sync.’ You basically tap the button when the lyrics should be coming in.
It may take some time for Instagram to pull the info from MusixMatch and have the changes live in Instagram Stories.
Other Notes:
- Musixmatch should pull your new releases from Spotify and Apple Music. If your music is not on musixmatch.com, you will need to email them at artists@musixmatch.com with Spotify and Apple Music links to your release.
- Make sure to input the lyrics accurately the first time around, because it can be annoying to fix and redo. The same goes for syncing the lyrics to the song. Once the song is synced, there’s no way to redo without having to email them and have them start the process over.
- If there are instrumental gaps between lyrics
- It can take days and maybe even a week for song lyrics to show in Instagram Stories so be patient.
If your song lyrics actually contain the word “lyrics,” it may be flagged as spam and not save to the website.
For more on leveraging song lyrics in your marketing, you can also check out this blog.
Sell Merch Directly on Instagram
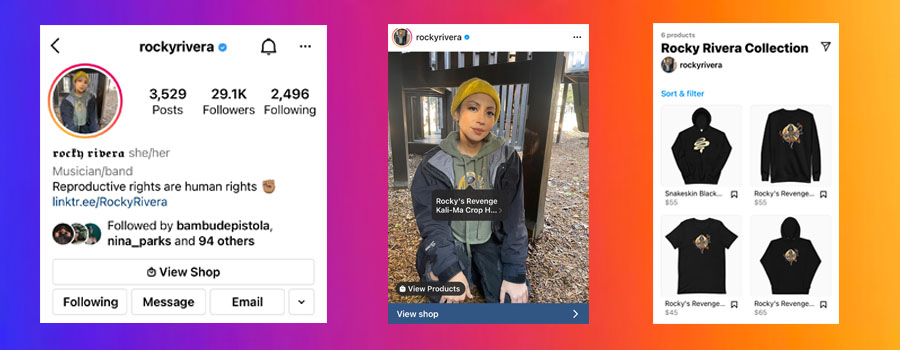
Instagram Shopping is a feature that allows you to tag merch items you are selling in your Instagram photos, videos, Stories, Reels and IG Live so fans can buy products directly on Instagram or get linked to your online store to buy it. It basically creates an online store front right on your Instagram profile.
It is a bit of a process to set up and there are some requirements that need to be met.
Convert to a Creator Account
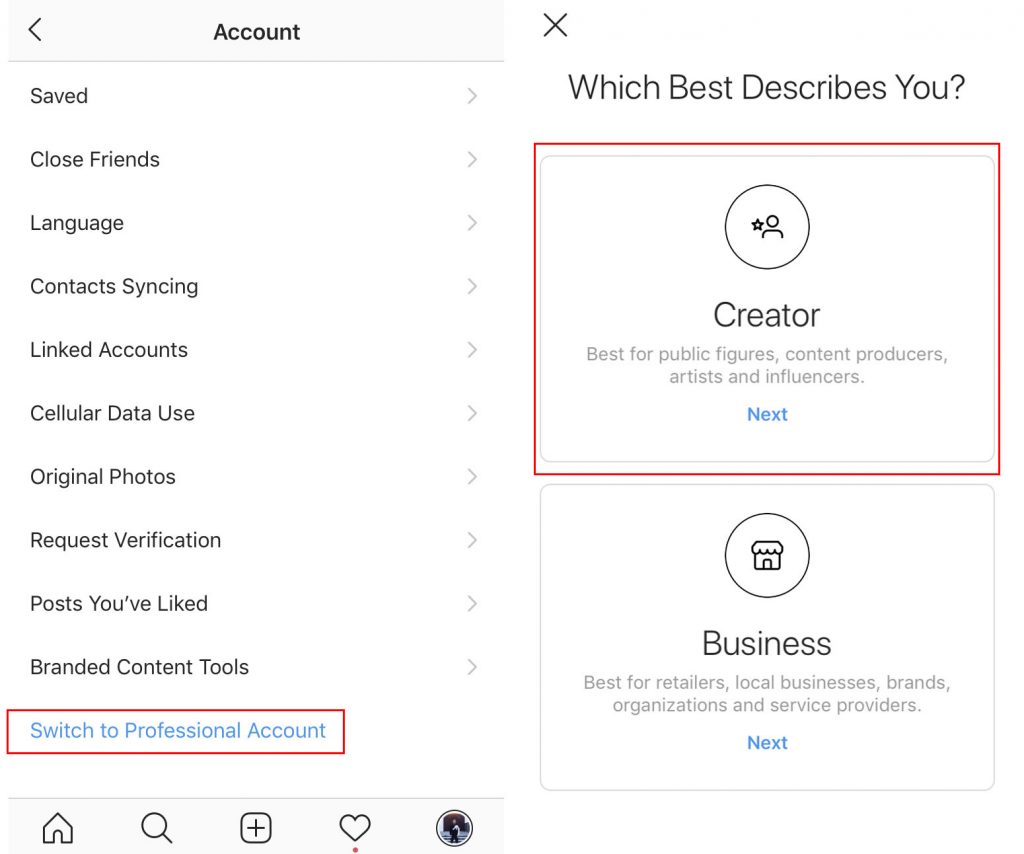
One of the first things you should do, if you haven’t already, is convert your Personal account into a Creator account. Instagram now has two types of Professional accounts and the Creator account was made for artists, musicians, influencers and other public figures.
A Business account used to be the standard for anyone that wasn’t using it for only personal use, but now it applies more for retailers, local businesses and organizations.
Creator Account gives you:
- Access to growth metrics in your analytics.
- A ‘Promotions’ button to easily pay to promote your posts.
- An action button to your public profile. The most relevant action button is ‘Email’ unless you use a service like SuperPhone where you can have people call or text you.
- Separate tabs for direct messages (DMs) to make it easier to manage higher volumes of DMs.
Link Sticker in Instagram Stories
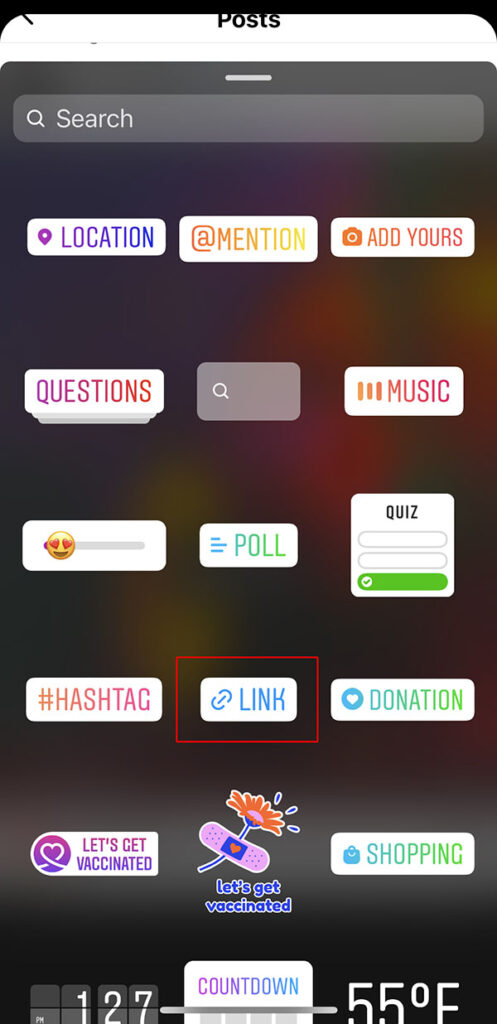
Update: The swipe up function has been retired and replaced by a link sticker. You can add a sticker to your Stories that users can click to take them to another website.
As you may already know, you are only allowed one active that can link outside of Instagram, which is on your Instagram bio. You can’t even share a clickable link in your post captions. The only other way to show links is using the Link sticker in Stories. The best part is this feature has opened up to everyone. You no longer need 10k followers like the the original swipe up required. It makes it so convenient and useful to link your fans to your videos, ticket links and merch.

Tap the link sticker with the chain next to it. Type in the URL you want people to go to when they tap the link. Click ‘done’ when finished then post your Story as you normally would.
Bonus Tip: You can place a GIF sticker over the link sticker and have the GIF sticker be clickable. After adding the URL to your link sticker, pinch it down to its smallest size on your Story and add a GIF sticker. Search something like “Tap Here” or “Buy Now” and find something that could cover the link sticker completely. Now after you publish your Story, your fans can tap the GIF sticker to go the website in your link sticker.
Add More Links to Your Profile

We all know that you can only have one active URL at a time. A common workaround is to use one of these free link services that allow you to display multiple links from the URL in your Instagram bio.
Once you create an account, you will copy the URL they provide and insert it into your Instagram bio. Now when someone clicks on it, it will load a simple page with other links in it. You can include a link to your website, your latest single, music videos, merch or a newsletter sign up.
Schedule Posts to Instagram from Desktop / Laptop
Instagram is known as a mobile app, where all your photo and video posting is done from your phone. Now, you can actually post from your computer to Instagram. Better yet, you can even schedule posts, which is something you generally couldn’t do in the past on the mobile app.
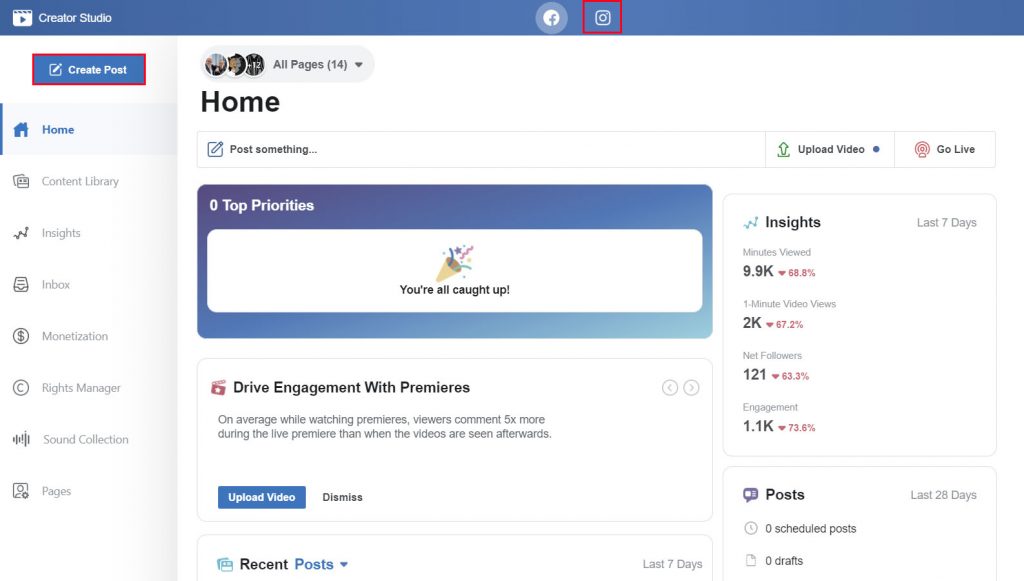
To get started, you’ll need to go to Creator Studio and link your Instagram page to your Facebook page.
https://business.facebook.com/creatorstudio
From the main screen on Creator Studio, click the Instagram icon at the very top, next to the Facebook icon. If you haven’t connected Instagram yet, it will prompt you to do so.
Once you’ve done that, click on the ‘Create Post’ button on the top left to start your post. Currently, you can post to the Instagram feed and IGTV with Creator Studio, but not Stories.
Captions operate and format the same way they do on the mobile app. Hashtags should be included in the caption since you can’t comment on Creator Studio. One of the benefits of posting through Creator Studio is that it will tell you how many characters, hashtags and mentions you’ve used in the post.
To schedule the post, click on the arrow icon next to the ‘Publish’ button, and it will ask for a date and time.
Adding Line Breaks to Your Bio
As discussed above, Instagram will not format your text the way you want it and allow line breaks. Normally, if you do line breaks or an empty line using the ‘return’ button, it doesn’t stick in Instagram. It ends as one big paragraph.
1) Use a Notes app – To format your bio the way you want, first type and format it in another app like Notes on an iPhone. Copy and paste it into your Instagram bio section and save.
2) Use this web app – Type your bio formatted the way you want in this web app. Convert it then paste it into your Instagram bio.
https://apps4lifehost.com/Instagram/CaptionMaker.html
Request Verification for Blue Check Mark
You can now manually request a verification blue checkmark on your Instagram profile to show people you are official.
Go to Settings -> Account -> Request Verification
Just keep in mind that this is for more established or recognized public figures. You can read more here.
Post Notifications
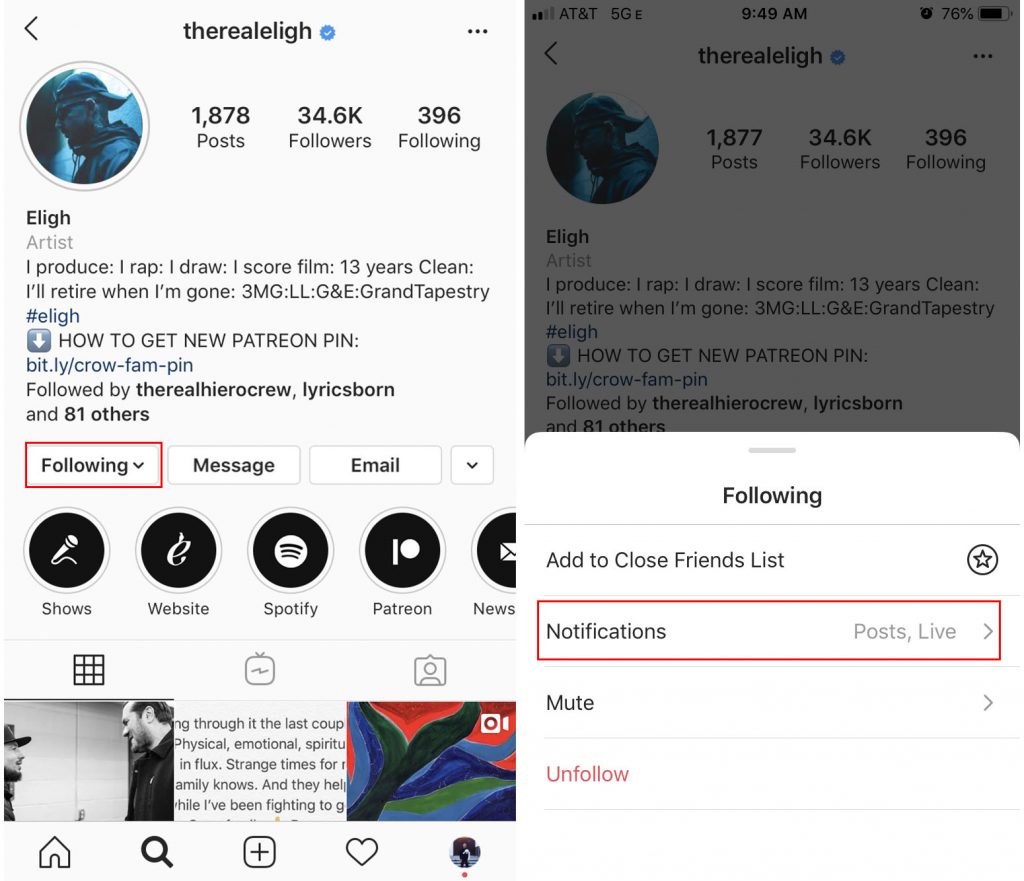
You can be notified with a pop-up notification on your phone whenever someone posts on Instagram. Fans may naturally do this for certain people they follow. Encouraging fans to turn on notifications whenever you post is always helpful for getting any engagement boost in the news feed.
One way to encourage this is to offer some giveaways that require followers to respond as quickly as possible.
Hashtag / Location Tools
By now, most people on the platform understand the importance of hashtags for visibility and exposure on Instagram. You can use up to 30 hashtags in a standard post and 10 in a Story. Just keep in mind that only 3 hashtags used in Stories have the potential to show up in the hashtag Stories feed.
You also have the ability to geotag your posts and Stories so others can see what you’ve posted when they click on the location. Locations that are searched for will also display posts that were tagged.
Follow Hashtags
One of the newer functions of Instagram is the ability to follow hashtags. Doing so allows posts to show in your feed from others using the hashtag you are following. Followed hashtags will also show as a bubble in your Stories feed up top. This is a good way to keep tabs on local hashtags that are relevant to you as a musician, or tied to a community you want to engage with.
Or maybe you have your own hashtag associated with your brand, whether it’s your name or tagline, that you want to follow.
Link Hashtags and Other Accounts in Your Bio
You can include hashtags and other Instagram accounts in your profile bio so they are clickable. This is just a convenient way to link to other artists or accounts you may have. You might even have your own branded hashtag you want to display.
Appear in More Search Results on Instagram
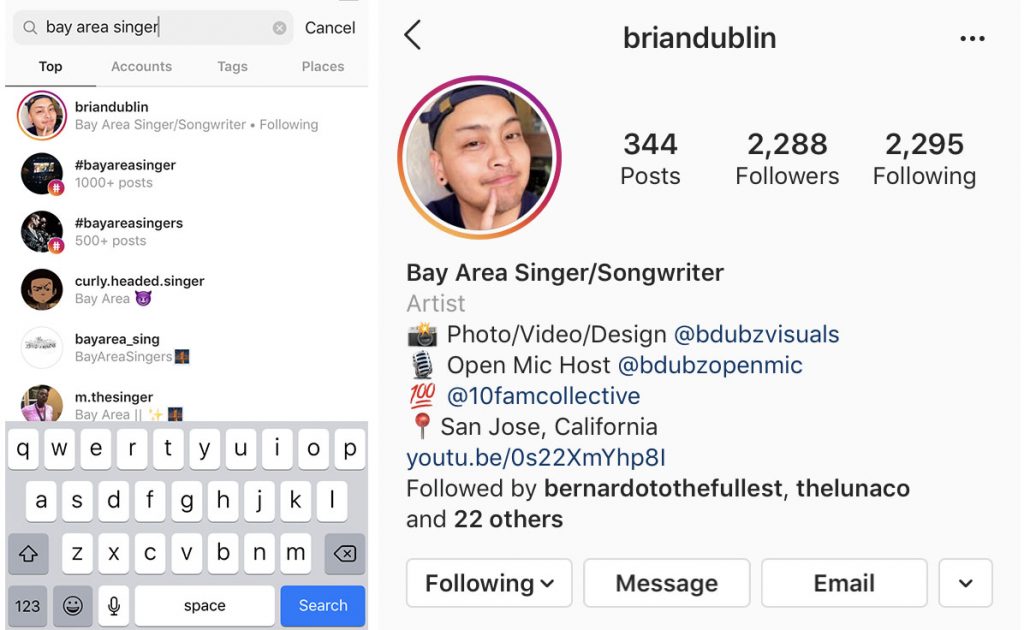
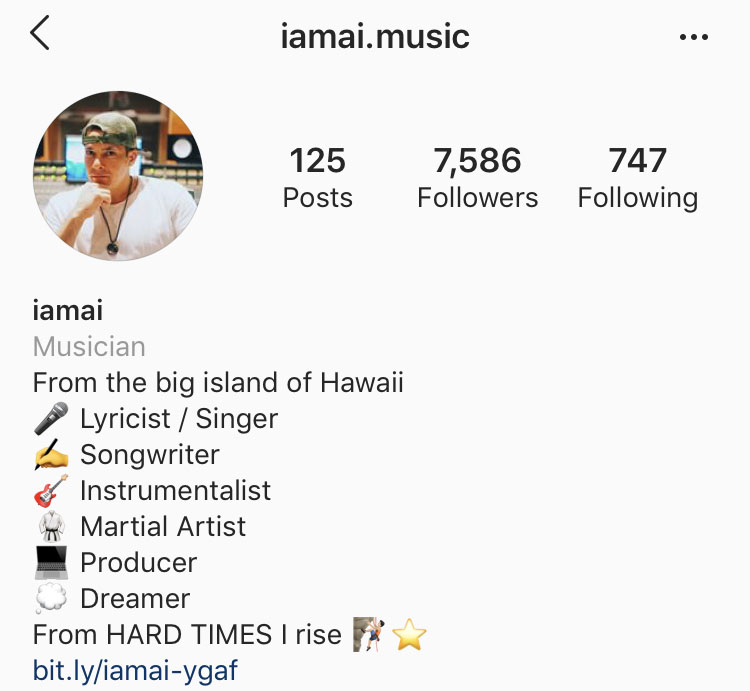
The ‘Name’ field in your Instagram bio is actually searchable, meaning Instagram uses what you type here to display results in their search function. You can add other words in the ‘Name’ field so that someone searching for that word will be more likely to see your profile. Just keep in mind the character limit is 30.
For example, if someone types “bay area singer” in Instagram’s search function, your profile will show up if you put that in the ‘Name’ field of your bio.
Change Display Font on Profile
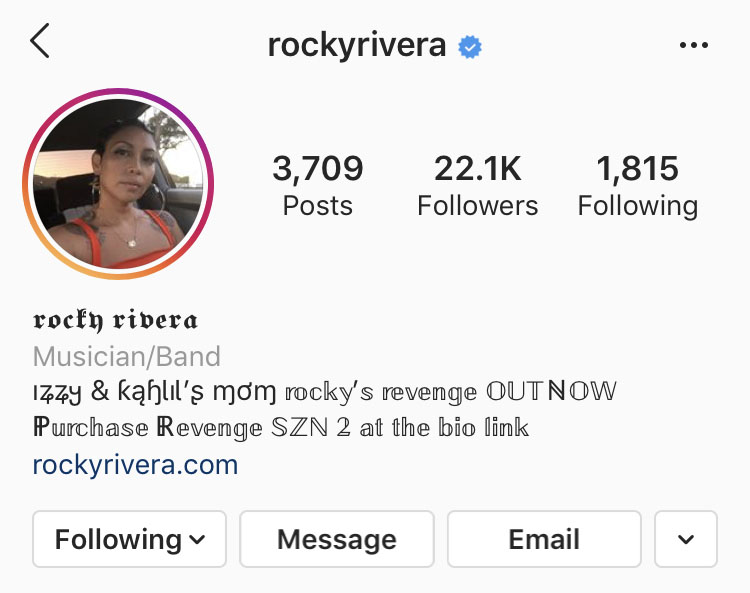
You have the ability to change the fonts displayed on your profile. It’s a good way to show some uniqueness for your branding, but don’t overdo it.
Planning Out Post Layouts
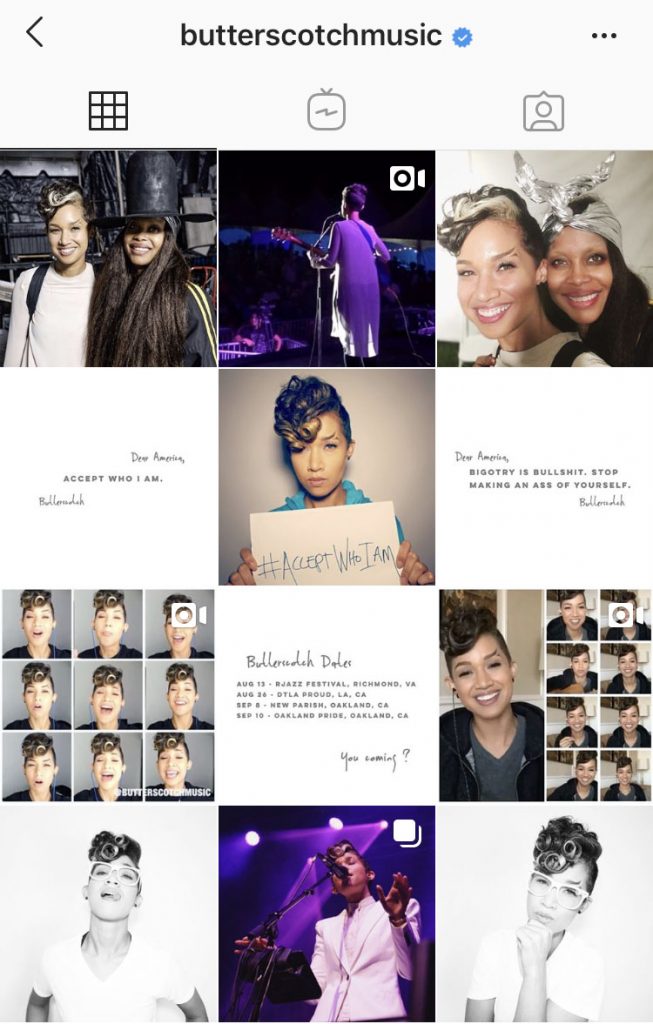
Having a clean grid of photos when someone lands on your Instagram profile can create a positive impression for your brand. However, it may not be easy to see how your posts would look as a whole. There are a number of apps that help you visualize and plan your posts out.
Add a Clickable Link in IGTV Post Descriptions
Links saved in IGTV video descriptions are now clickable. You don’t need a certain amount of followers as it works for all users. The only drawback is that viewers need to expand the description box by clicking on it to see the link.
Post IGTV Preview in Your Feed
If you want to post videos over 60 seconds, use IGTV and post a preview to your Instagram Feed. Don’t forget you can link people to your IGTV videos in Stories, even if you don’t have 10k followers.
As of right now, you can’t use IGTV posts or previews in Instagram Ad campaigns.
IGTV Supports Landscape / Widescreen Video
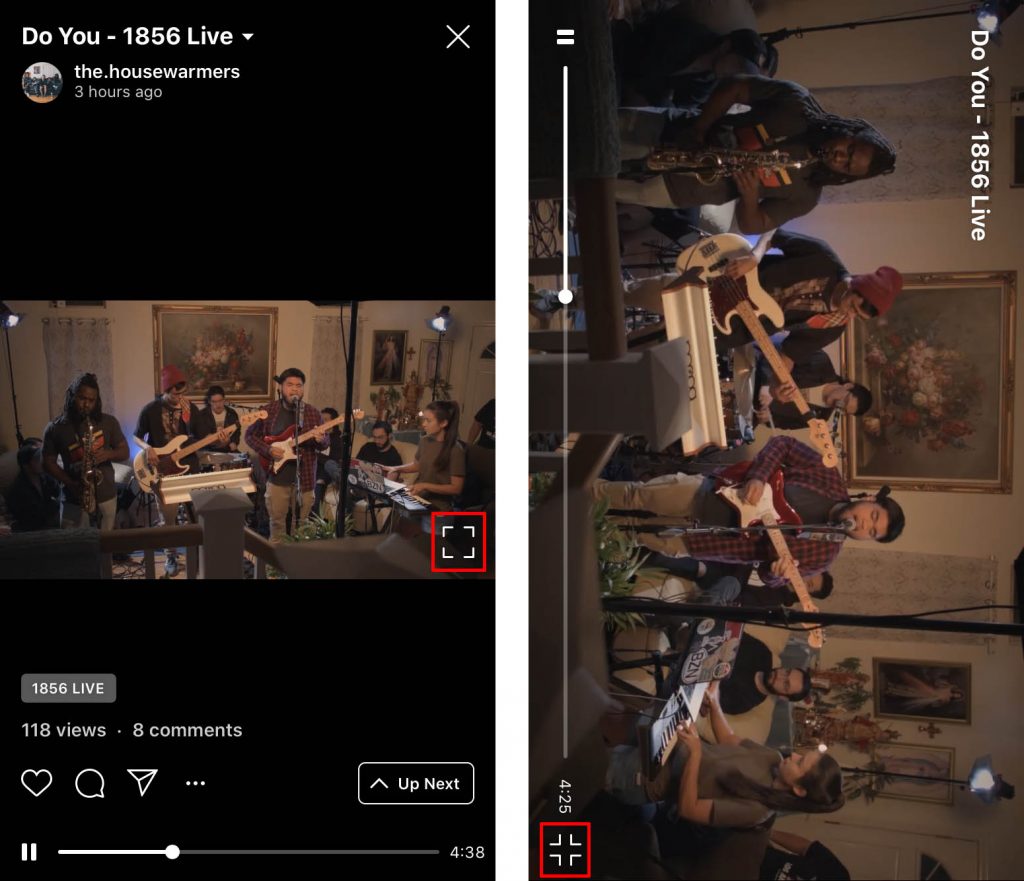
You can now upload videos that don’t take up the full screen vertically. If you upload a typical landscape 16:9 video, you can tap the square corner icon on the bottom right corner in IGTV to change the screen orientation to widescreen. Before this change, your IGTV video had to be shot or rendered at 9:16 vertical video to fill the screen.
Read more about this update here.
Repost Other People’s Content in Your Newsfeed
Instagram does not have a native share function that allows you to post someone else’s content to your own feed. There are a few apps that allow you to do this, but the one I have used is Repost app.
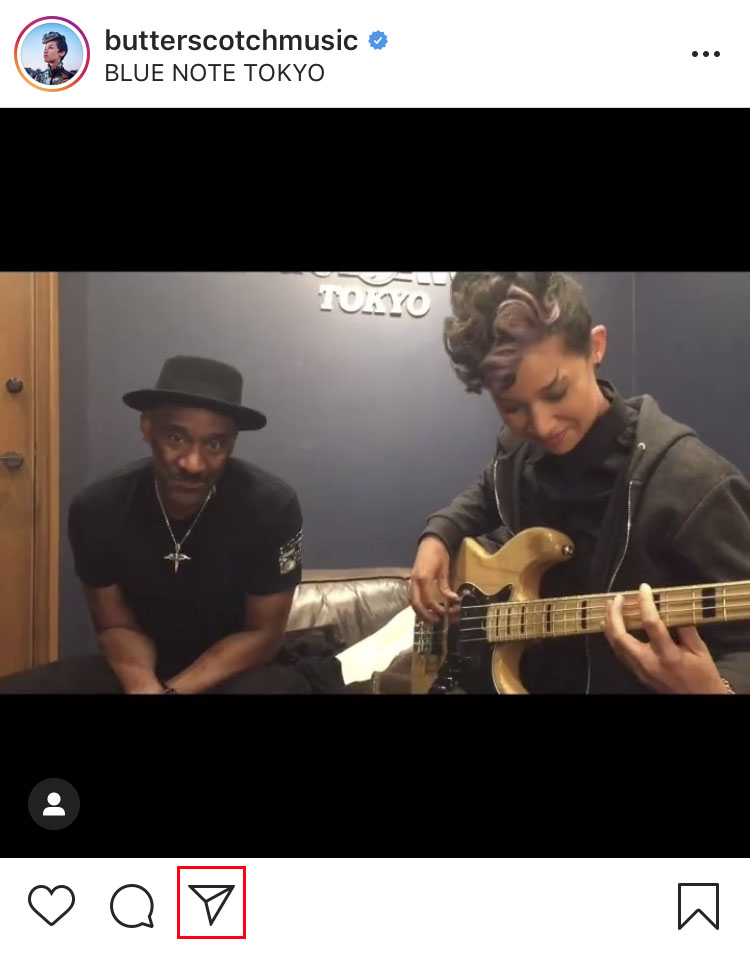
Share Posts into Your IG Stories
Instagram algorithms dictate what people see in the feed based on a number of variables. One of them is engagement. This means not everyone will see what you’ve posted. A way to drive extra views on a new post is to share it to your Stories. What people will commonly do is find a way to tease or entice people to click the post to create some urgency to see it.
This is great for sharing other people’s posts you like into your own Stories. I like to think this is Instagram’s way of allowing users to share other content and posts.
Upload Multiple Stories at Once
If you’re posting multiple Stories to Instagram, you can load up to 10 photos or 15-second video clips at once so you can edit and publish in bulk. You can edit each Story one at a time.
Note that if you select a video clip longer than 15 seconds in this mode, it won’t automatically split them like it normally would if you didn’t use this feature. Hopefully, this may change in the future. In the meantime, the workaround is to load a longer video clip up to a minute into Stories, then download each individual 15-second clip.
Hide Posts Without Deleting Them / Archive Old Posts
Once you post something, you don’t have to delete it if you don’t want it to be visible in your profile. You have the ability to archive posts so you still have access, and even bring it back another time. For musicians, I like to hide flyers after an event is over. Having a bunch of flyer posts on your Instagram profile is not attractive so this is a good way to hide them.
To archive, click on the ‘…’ in the upper right-hand corner of your post and select ‘Archive’ to hide it from your profile.
To view all your archived posts, click on the 3 line icon in the top right-hand corner of your Instagram profile and select ‘Archive’. By default, it should show you archived Stories. Click the word ‘Archive’ in the top middle, then select ‘Posts’ to see archived posts.
Control Photos and Videos You’re Tagged In
There’s actually an entire section on your profile that shows content that others posted and tagged you in. Swipe left twice on a profile page to see.
By default, it’s set to ‘Add Automatically’. Some people may not always like what they are tagged in so you can actually approve anything before it displays in this section.
To do this, go to your ‘Settings -> Privacy -> Tags -> Toggle ‘Add Automatically’ off. Below this option, you can manually select individual photos or videos to hide in the tagged section of your profile.
When someone tags you, you’ll get a notification. Go to the post you were tagged in and click your username tag in the post itself. You can also click the top ‘…’ in the upper right-hand corner of the post and select ‘Post Options’ to add to your profile.
Disable Activity Status on Instagram
By default, if you’re using the Instagram app, others will see ‘active now’ under your name on the direct messaging page of the app. If you’re away, it will display when you were last on Instagram. It’s a convenient way to know who’s active on the Instagram app so you can reach out to them with a direct message if you need it.
Some people don’t want others to know this, so you can easily turn it off. If you switch this off, it means you can’t see anyone else’s activity status.
Settings -> Privacy -> Activity Status -> Show Activity Status
You don’t have to worry about the public or any of your followers seeing this unless you’ve accepted their message request in the ‘Message Requests’ tab. Otherwise, people who you follow that you follow you back will see this.
Quick Tips
- Carousel Posts: Creating a carousel post (where you can post up to 10 photos and videos in a single post) is a great way to get engagement. The reason why is because Instagram will automatically show different photos and videos in your follower’s newsfeed if they don’t engage with it the first time. I’ve seen this myself a number of times where I would scroll past someone’s carousel post, then another photo/video in that same post will pop into my newsfeed later.
- IG Live Notifications: Whenever you go live with IG Live, all your followers will get a notification by default (unless they turned them off). If you hop on someone else’s IG Live as a guest, your followers will also get notifications. This makes IG Live an effective tool to get people attention and cross-promote audiences without having to worry about their algorithms.
- IG Live to IGTV: You can now post your IG Live videos directly to IGTV so people can re-watch anytime. Be sure to share the IGTV video to your Stories after your livestream is done to get more views.

Awesome content and great shares! Thanks D!
Thanks for reading Tia!
Thank you for the article. Great advice.
TheYellowOne